Dynamic Application Security Testing (DAST) [ULTIMATE]
Introduced in GitLab Ultimate 10.4.
Running static checks on your code is the first step to detect vulnerabilities that can put the security of your code at risk. Yet, once deployed, your application is exposed to a new category of possible attacks, such as cross-site scripting or broken authentication flaws. This is where Dynamic Application Security Testing (DAST) comes into place.
Overview
If you are using GitLab CI/CD, you can analyze your running web application(s) for known vulnerabilities using Dynamic Application Security Testing (DAST).
You can take advantage of DAST by either including the CI job in
your existing .gitlab-ci.yml file or by implicitly using
Auto DAST
that is provided by Auto DevOps.
GitLab checks the DAST report, compares the found vulnerabilities between the source and target branches, and shows the information right on the merge request.
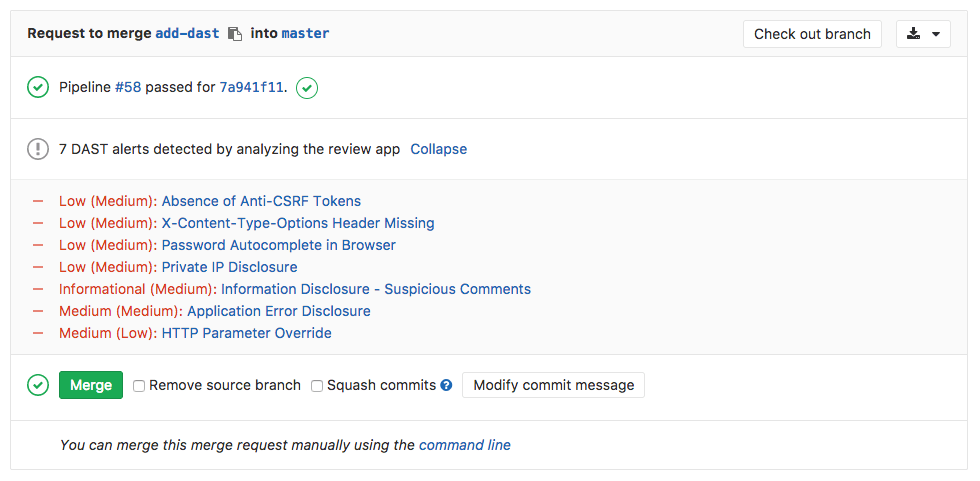
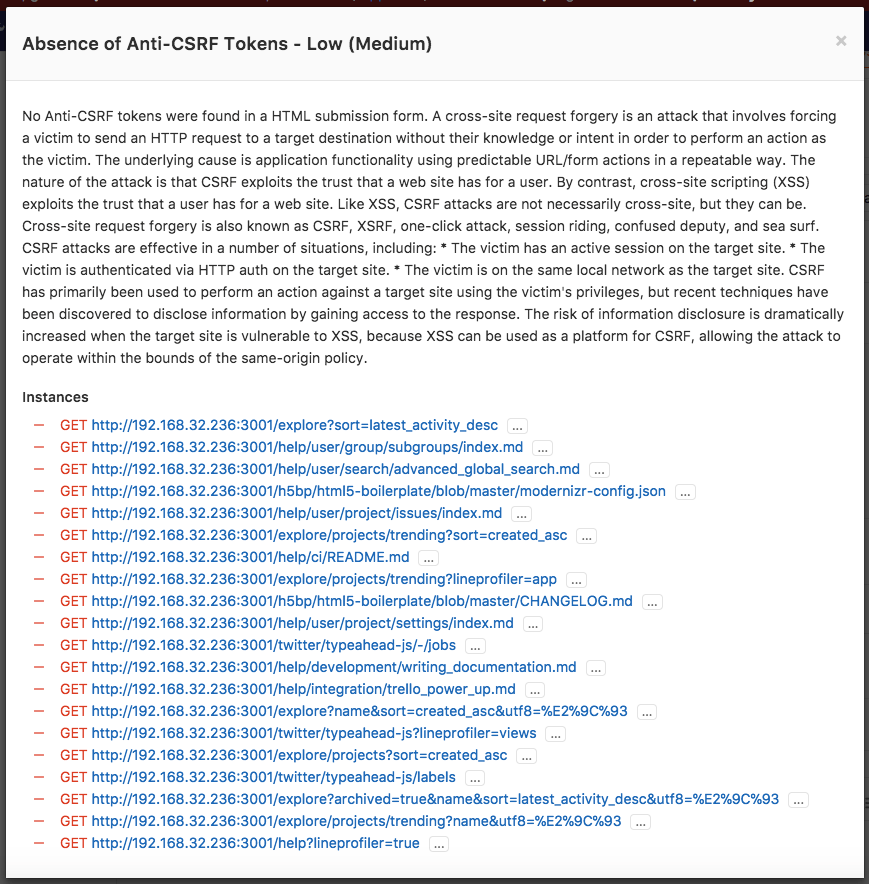
By clicking on one of the detected linked vulnerabilities, you will be able to see the details and the URL(s) affected.
Dynamic Application Security Testing (DAST) is using the popular open source tool OWASP ZAProxy to perform an analysis on your running web application.
By default, DAST executes ZAP Baseline Scan and will perform passive scanning only. It will not actively attack your application.
However, DAST can be configured to also perform a so-called "active scan". That is, attack your application and produce a more extensive security report. It can be very useful combined with Review Apps.
The dast Docker image in GitLab container registry is updated on a weekly basis to have all owasp2docker-weekly updates in it.
Use cases
It helps you automatically find security vulnerabilities in your running web applications while you are developing and testing your applications.
Requirements
To run a DAST job, you need GitLab Runner with the
docker executor.
Configuring DAST
To enable DAST in your project, define a job in your .gitlab-ci.yml file that generates the
DAST report artifact.
This can be done in two ways:
- For GitLab 11.9 and later, including the provided
DAST.gitlab-ci.ymltemplate (recommended). - Manually specifying the job definition. Not recommended unless using GitLab 11.8 and earlier.
Including the provided template
NOTE: Note: The CI/CD DAST template is supported on GitLab 11.9 and later versions. For earlier versions, use the manual job definition.
A CI/CD DAST template
with the default DAST job definition is provided as a part of your GitLab
installation which you can include
in your .gitlab-ci.yml file.
To enable DAST using the provided template, add the following to your .gitlab-ci.yml
file:
include:
  template: DAST.gitlab-ci.yml

variables:
  DAST_WEBSITE: https://example.com
The included template will create a dast job in your CI/CD pipeline and scan
your project's source code for possible vulnerabilities.
The report will be saved as a DAST report artifact that you can later download and analyze. Due to implementation limitations we always take the latest DAST artifact available. Behind the scenes, the GitLab DAST Docker image is used to run the tests on the specified URL and scan it for possible vulnerabilities.
There are two ways to define the URL to be scanned by DAST:
- Set the
DAST_WEBSITEvariable. - Add it in an
environment_url.txtfile at the root of your project.
Authenticated scan
It's also possible to authenticate the user before performing the DAST checks:
include:
  template: DAST.gitlab-ci.yml

variables:
  DAST_WEBSITE: https://example.com
  DAST_AUTH_URL: https://example.com/sign-in
  DAST_USERNAME: john.doe@example.com
  DAST_PASSWORD: john-doe-password
  DAST_USERNAME_FIELD: session[user] # the name of username field at the sign-in HTML form
  DAST_PASSWORD_FIELD: session[password] # the name of password field at the sign-in HTML form
  DAST_AUTH_EXCLUDE_URLS: http://example.com/sign-out,http://example.com/sign-out-2 # optional, URLs to skip during the authenticated scan; comma-separated, no spaces in between
The report will be saved as a DAST report artifact that you can later download and analyze. Due to implementation limitations, we always take the latest DAST artifact available.
Full scan
DAST can be configured to perform ZAP Full Scan, which includes both passive and active scanning against the same target website:
include:
  template: DAST.gitlab-ci.yml

variables:
  DAST_FULL_SCAN_ENABLED: "true"
Customizing the DAST settings
The DAST settings can be changed through environment variables by using the
variables parameter in .gitlab-ci.yml.
These variables are documented in the DAST README.
For example:
include:
  template: DAST.gitlab-ci.yml

variables:
  DAST_WEBSITE: https://example.com
  DAST_TARGET_AVAILABILITY_TIMEOUT: 120
Because the template is evaluated before the pipeline configuration, the last mention of the variable will take precedence.
Overriding the DAST template
If you want to override the job definition (for example, change properties like
variables or dependencies), you need to declare a dast job after the
template inclusion and specify any additional keys under it. For example:
include:
  template: DAST.gitlab-ci.yml

dast:
  stage: dast # IMPORTANT: don't forget to add this
  variables:
    DAST_WEBSITE: https://example.com
    CI_DEBUG_TRACE: "true"
As the DAST job belongs to a separate dast stage that runs after all
default stages,
don't forget to add stage: dast when you override the template job definition.
Manual job definition for GitLab 11.5 and later
For GitLab 11.5 and GitLab Runner 11.5 and later, the following dast
job can be added:
dast:
  image: registry.gitlab.com/gitlab-org/security-products/zaproxy
  variables:
    website: "https://example.com"
  allow_failure: true
  script:
    - mkdir /zap/wrk/
    - /zap/zap-baseline.py -J gl-dast-report.json -t $website || true
    - cp /zap/wrk/gl-dast-report.json .
  artifacts:
    reports:
      dast: gl-dast-report.json
Where the website variable holds the URL to run the tests against.
For an authenticated scan, use the following definition:
dast:
  image: registry.gitlab.com/gitlab-org/security-products/zaproxy
  variables:
    website: "https://example.com"
    login_url: "https://example.com/sign-in"
    username: "john.doe@example.com"
    password: "john-doe-password"
  allow_failure: true
  script:
    - mkdir /zap/wrk/
    - /zap/zap-baseline.py -J gl-dast-report.json -t $website
        --auth-url $login_url
        --auth-username $username
        --auth-password $password || true
    - cp /zap/wrk/gl-dast-report.json .
  artifacts:
    reports:
      dast: gl-dast-report.json
See the zaproxy documentation to learn more about the authentication settings.
Manual job definition for GitLab 11.4 and earlier (deprecated)
CAUTION: Caution:
Before GitLab 11.5, DAST job and artifact had to be named specifically
to automatically extract report data and show it in the merge request widget.
While these old job definitions are still maintained they have been deprecated
and may be removed in next major release, GitLab 12.0. You are strongly advised
to update your current .gitlab-ci.yml configuration to reflect that change.
For GitLab 11.4 and earlier, the job should look like:
dast:
  image: registry.gitlab.com/gitlab-org/security-products/zaproxy
  variables:
    website: "https://example.com"
  allow_failure: true
  script:
    - mkdir /zap/wrk/
    - /zap/zap-baseline.py -J gl-dast-report.json -t $website || true
    - cp /zap/wrk/gl-dast-report.json .
  artifacts:
    paths: [gl-dast-report.json]
Security Dashboard
The Security Dashboard is a good place to get an overview of all the security vulnerabilities in your groups and projects. Read more about the Security Dashboard.
Interacting with the vulnerabilities
Once a vulnerability is found, you can interact with it. Read more on how to interact with the vulnerabilities.