Continuous Integration and Deployment Admin settings [CORE ONLY]
In this area, you will find settings for Auto DevOps, Runners and job artifacts. You can find it in the admin area, under Settings > Continuous Integration and Deployment.

Auto DevOps [CORE ONLY]
To enable (or disable) Auto DevOps for all projects:
- Go to Admin area > Settings > Continuous Integration and Deployment
- Check (or uncheck to disable) the box that says "Default to Auto DevOps pipeline for all projects"
- Optionally, set up the Auto DevOps base domain which is going to be used for Auto Deploy and Auto Review Apps.
- Hit Save changes for the changes to take effect.
From now on, every existing project and newly created ones that don't have a
.gitlab-ci.yml, will use the Auto DevOps pipelines.
If you want to disable it for a specific project, you can do so in its settings.
Maximum artifacts size [CORE ONLY]
The maximum size of the job artifacts can be set in the Admin area of your GitLab instance. The value is in MB and the default is 100MB per job; on GitLab.com it's set to 1G.
To change it:
- Go to Admin area > Settings > Continuous Integration and Deployment.
- Change the value of maximum artifacts size (in MB).
- Hit Save changes for the changes to take effect.
Default artifacts expiration [CORE ONLY]
The default expiration time of the job artifacts
can be set in the Admin area of your GitLab instance. The syntax of duration is
described in artifacts:expire_in
and the default value is 30 days. On GitLab.com they
never expire.
- Go to Admin area > Settings > Continuous Integration and Deployment.
- Change the value of default expiration time.
- Hit Save changes for the changes to take effect.
This setting is set per job and can be overridden in
.gitlab-ci.yml.
To disable the expiration, set it to 0. The default unit is in seconds.
Shared Runners pipeline minutes quota [STARTER ONLY]
Introduced in GitLab Starter 8.16.
If you have enabled shared Runners for your GitLab instance, you can limit their
usage by setting a maximum number of pipeline minutes that a group can use on
shared Runners per month. Setting this to 0 (default value) will grant
unlimited pipeline minutes. While build limits are stored as minutes, the
counting is done in seconds. Usage resets on the first day of each month.
On GitLab.com, the quota is calculated based on your
subscription plan.
To change the pipelines minutes quota:
- Go to Admin area > Settings > Continuous Integration and Deployment
- Set the pipeline minutes quota limit.
- Hit Save changes for the changes to take effect
While the setting in the Admin area has a global effect, as an admin you can also change each group's pipeline minutes quota to override the global value.
- Navigate to the Groups admin area and hit the Edit button for the group you wish to change the pipeline minutes quota.
- Set the pipeline minutes quota to the desired value
- Hit Save changes for the changes to take effect.
Once saved, you can see the build quota in the group admin view. The quota can also be viewed in the project admin view if shared Runners are enabled.

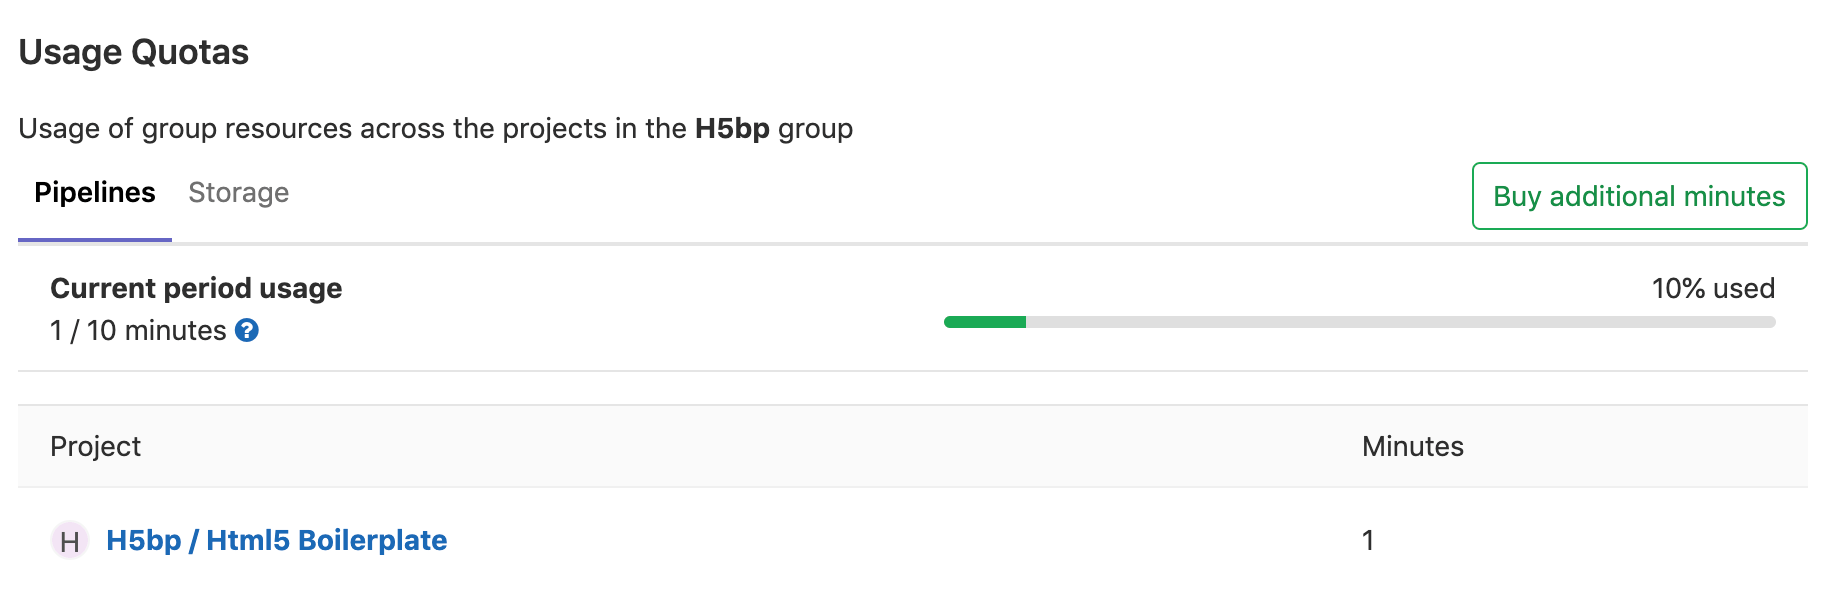
You can see an overview of the pipeline minutes quota of all projects of a group in the Usage Quotas page available to the group page settings list.
Extra Shared Runners pipeline minutes quota
NOTE: Note: Only available on GitLab.com.
You can purchase additional CI minutes so your pipelines will not be blocked after you have used all your CI minutes from your main quota.
In order to purchase additional minutes, you should follow these steps:
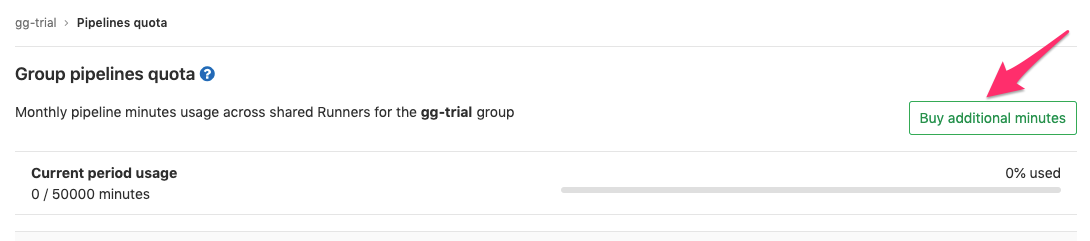
-
Go to Group > Settings > Pipelines quota. Once you are on that page, click on Buy additional minutes.

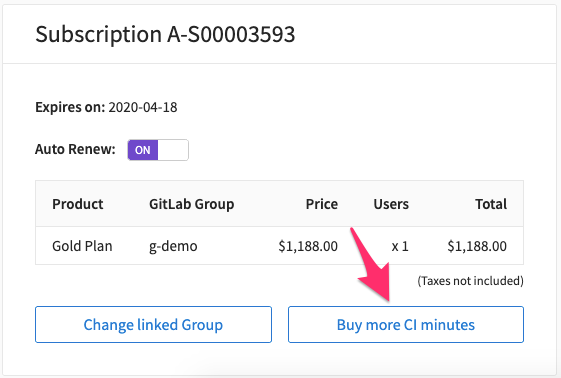
-
Locate the subscription card that is linked to your group on GitLab.com, click on Buy more CI minutes, and complete the details about the transaction.
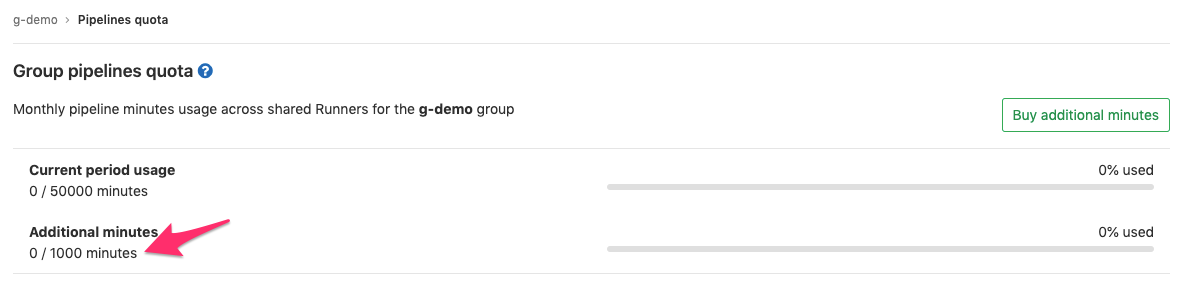
-
Once we have processed your payment, the extra CI minutes will be synced to your Group and you can visualize it from the Group > Settings > Pipelines quota page:
Be aware that:
- If you have purchased extra CI minutes before the purchase of a paid plan, we will calculate a pro-rated charge for your paid plan. That means you may be charged for less than one year since your subscription was previously created with the extra CI minutes.
- Once the extra CI minutes has been assigned to a Group they cannot be transferred to a different Group.
- If you have some minutes used over your default quota, these minutes will be deducted from your Additional Minutes quota immediately after your purchase of additional minutes.
What happens when my CI minutes quota run out
When the CI minutes quota run out, an email is sent automatically to notifies the owner(s) of the group/namespace which includes a link to purchase more minutes.
If you are not the owner of the group, you will need to contact them to let them know they need to purchase more minutes.
Archive jobs [CORE ONLY]
Archiving jobs is useful for reducing the CI/CD footprint on the system by removing some of the capabilities of the jobs (metadata needed to run the job), but persisting the traces and artifacts for auditing purposes.
To set the duration for which the jobs will be considered as old and expired:
- Go to Admin area > Settings > CI/CD > Continuous Integration and Deployment.
- Change the value of "Archive jobs".
- Hit Save changes for the changes to take effect.
Once that time passes, the jobs will be archived and no longer able to be
retried. Make it empty to never expire jobs. It has to be no less than 1 day,
for example: 15 days, 1 month, 2 years.